Tuesday, July 22, 2014

A Side of Pizza Pasta

I'm not much of a Summer fan. The heat and humidity don't mix very well with my pasty, fluffy body. I have lived in the South all my life, and you'd think it wouldn't bother me very much anymore, but it's something that I really can't acclimatize myself to, no matter what. So, how do I survive?

By eating that. Cucumbers may be available all year long, but there is something about eating them during the Summer that makes them extra refreshing. The real trick is using Duke's mayonnaise. Nothing else even makes a cucumber sandwich worth eating...but that's just this Southern gal's opinion.

I have found myself falling prey to taking some of the online quizzes that I've seen posted on Facebook lately. On more than one of them, there was a question that asked what food you would choose if you could only eat that for the rest of your life.

Yeah, it's pizza. Without a doubt.
My husband would probably choose burgers, and I can appreciate that, but for me it's pizza all the way. Especially cheeseburger pizza. And double pepperoni pizza. With bacon.
Lots of bacon.

So needless to say that my ears perked up the first time I heard about pizza pasta.  After I read the recipe, I got hooked. I think the idea is brilliant, and I could kiss the person who thought of it! Now that said, while I love the idea of making it into the main dish, I think the idea of trying to incorporate pizza into side dishes is something I can really get behind. So I tweaked things a little bit, and made it a little lighter so I could serve it along with my dinner last week.  It turned out great!

So they make these really tiny sliced pepperonis for salads that would be adorable in this dish...if that kind of thing matters to you. It doesn't matter to me, and I didn't have them anyway so I used regular and chopped them into fourths. You can use whatever cooked pasta works for you. The popular choice from the recipes I looked at I used ziti because it's one of my favorites next to bowtie!

There's no fancy prep here with the exception of mixing all dry ingredients together first before adding them to the pasta. You basically throw everything into the bowl and then put it in the fridge so the flavors can "marry" for a while. The longer this sits the better it is, but I made it a couple of hours before dinner and it was fine. I did end up enjoying the flavors a bit more the next day, though.

This is a great side dish for anything from hot dogs, hamburgers and pork chops to just eating it by itself for lunch the next day. Not that I did that or anything. Especially not two days in a row. I'd never do that.

I probably won't do it again the next time I make it, either.
Except that I totally will...and I just might add in some crumbled cooked sausage.
*sheepish grin*


Thursday, July 3, 2014

Cooking, But in a Different Way

So no posts in a long time. I know.
In the past two months, I have....
  • Along with my husband, purchased our first home
  • Dealt with the unexpected death of my childhood best friend
  • Adjusted to being new homeowners and all the stuff that comes with it
  • Had three birthdays and Father's Day all in one weekend
  • Watched my first niece graduate high school
  • I had unexpected dental surgery and subsequent dental procedures that between the two of us has (so far) totaled nearly $3,000 out of pocket AFTER insurance.
It's been a little crazy, to say the least. Not tons of cooking has taken place as of late, unless you count cakes and pies for birthdays and other holidays. I have the absolute BEST recipe for carrot cake. Ever. I say this with confidence. When my father requested this as his personal cake flavor choice for Father's Day...I rejoiced! I also think I may have converted a few of my family members over to the carrot side.

After uploading that picture, I want another piece of that sucker...like right now. It's a good thing that it's just my husband and myself in the house. I am able to deter myself from doing massive amounts of baking due to the fact that we don't need all of that yummy goodness laying around the house for just two people.

So when we moved into the new house, there were several things that we weren't happy with (who the heck paints a WHOLE HOUSE yellow...EVERY SINGLE ROOM?!) I took one look at the stair railing in the split foyer and knew that I couldn't be happy with it. The house had been flipped and completely renovated in a lot of ways...and some of it had been left alone in other ways. Unfortunately, some of it didn't make sense together. This railing was one of those things.

They had refinished the floors in a cherry floating pergo. I like cherry stain very much, although my heart truly lies with the darker woods like walnut and mahogany, which was good since the new cabinets were indeed walnut. I don't even mind the mixture of the finishes, but this railing...oh, this railing...

Honey Oak. *facepalm*
Honey Oak may be my very least favorite wood ever, with the exception of knotty pine. What's funny is that in most of the pictures, you can't really tell there is much difference in the hues of the woods.

Does that help?
Ugh. I just...I can't even.

Soooo...I told my husband I thought it needed to be redone. As in staining the railings cherry and painting the balusters white. One thing to know about my wonderful husband: he's not much of a fan of change. AT ALL. It took me whining showing him photos of what it would look like via Pinterest before he agreed that it would look better. 

Then I told him I was going to do it. I've never done anything even remotely close to something like this before...ever.

That actually went over better than telling him I wanted to change it. Go figure. I suppose that's a compliment. Actually, I think my showing him a blog where a very smart lady did to her cabinets what I was planning to now do to our railings helped win him over. It helped things greatly that we had a whole month from closing until we actually moved into the house, so I got plenty of time to go work on things without worrying about cat hair getting into the mix.

Or so I thought.  Best laid plans and all...

I started with the tools needed for the job. Luckily, there is a woodworking shop near where I live that sold the gel stain, and I didn't have to order it. General Finishes is not something that Home Depot, Lowe's, or even specialty paint stores like Benjamin Moore carries on the shelf.

The color I chose, Georgian Cherry, is a bit darker than the flooring, but I was okay with that. After talking to the gentleman in the store and telling him what I had been reading, he gave me tips to make my job a lot easier: three coats was a bit excessive, 24 hours is enough to let it dry between coats of anything, wipe everything down with mineral spirits before AND after lightly sanding, tack cloth is not recommended because of potential sticky residue prior to staining so use a coffee filter instead because it's truly lint free. Also, Frog Tape is good, but not great. You still get bleed-through, even after sealing it down like it tells you to.

I'll spare you the details of how to put it on and everything else. It was actually very simple, just follow the directions. I just wanted to show you guys how awesome it turned out!

Now, truth be known, I would refinish a railing again any time. That wasn't bad at all, and it turned out gorgeous.

I will never ever EVER paint balusters again. Blocking them off with tape was bad enough, but painting them was a nightmare - and I'm actually pretty patient when it comes to detail work. In the end, I bought plastic sheeting and ended up spraying them. The fumes were awful even with the front door open, but it cut my time down so far that it was worth it. In the future I will just spend the money I spent on paint buying replacement balusters that are already white and replace them. 

A word of caution: you should probably wear a face mask when spraying. Otherwise, don't be alarmed when the insides of your nostrils match the color of the paint. 

Not that I had that happen to me or anything, you know. Surely not.
*gingerly clearing throat*

This may just be me, but I think it changes one's whole first impression as you walk through the front door. It looks cleaner and more updated.

I know, the steps don't match. I know. I can live with that for a while. One day we will replace them to match the flooring, but that is in the future. Right now there are other things we'd like to do first. That and there is a very nosy reason why that project is on hold: 

Meet Gray the Cat. I love her like no other, but there is literally nothing that she won't come over to investigate, sticking her furry little nose in everything! She is the very reason why I may have to childproof my kitchen cabinets. So needless to say, a lot of the inside house work kind of depends on whether or not we can keep Miss Nosy at bay.

So there we have it. Hope you guys like the results as well as I do! Thanks for being patient about the reveal!

Thursday, March 27, 2014

Recipe Spotlight: Spanish Rice by The First Year Blog

Last year, I ran across a recipe for Spanish rice by Beth at The First Year blog on Pinterest that was simply amazing. No kidding...it's awesome.  This is the recipe that you will thank me for finding and adding to your repertoire, and you won't believe how easy it is to make.

I made it the first time without the ground beef, because I served it as a side to my salsa chicken. Today I am making it with the beef to have as my main entree with a side of Mexican street corn, which I am making for the very first time and am super excited about!

As she says, start by adding a tablespoon of butter to a nonstick skillet, then add your chopped onions and cook until they are slightly browned. I actually did a full small onion because I love the contrast of onion to the rice. In the future, I will probably add about 1/4 cup of chopped green pepper as well. 

Once the onions are done, toss in your ground beef and brown it as well.  When that is cooked through, add the brown sugar, chili powder (I kicked it up a notch by also adding 1/4 tsp. of cayenne pepper), mustard and tomato sauce. Simmer for a few minutes, and then toss in your rice.

So in Beth's recipe, she calls for minute rice. I love the idea, but I really don't ever have it on hand, and I rarely ever buy it. What I do normally have on hand is uncooked brown rice and a rice cooker. 

Brown rice has a reputation of being boring and not very tasty, but I disagree! I throw mine in the steamer but I don't add water to it...I use homemade chicken broth. It's amazing! I roasted a chicken a few months ago, strained the broth from it and threw it in the freezer to use later. So while chicken broth is awesome to steam brown rice with...roasted chicken broth makes it aaaaaaa-mazing.

Simmer that for a few more minutes making sure to stir every so often, and then it's ready! It is SO good.
Also, in the vein of yesterday's post, it's really inexpensive to make! In fact, if you consider the fact that I have all the spices, broth and butter on hand which make them negligible...the whole recipe only cost me a whopping $3.91 to make. Probably even less considering I based it on the price of Minute Rice instead of plain brown rice. Seriously...you can't beat that!!

Here is her recipe. My tweaks are in parenthesis next to it.
Thanks for sharing your recipe, Beth!  We love it!


Ingredients
1/4 cup onion, chopped (I used one whole small onion)
1 tbsp butter
1/2 pound beef or ground turkey
1 tsp brown sugar
1/2 tsp dry mustard  (I used 1 tsp.)
1 1/2 tsp chili powder  (I used 2 tsp.)
1 can (15 oz) tomato sauce
1 cup minute rice (regular rice will not work because it takes too long to cook)

Wednesday, March 26, 2014

Chicken (kinda) Chow Mein - Eating better...you CAN afford it!

So a dear friend of mine sent me a Snapchat of of his lunch the other day:  a Lunchables. When I jokingly commented that I had taught him better than that, he replied that didn't pay his grocery bill. Truth.  So it got me to thinking...when I reworked this blog from a baking blog to what it is now, I did it with the idea of showing good food at prices that hopefully everyone could afford. It's been a long time since I did a "How Much is This Meal?" entry, and it's long overdue.

Last week I went shopping and got some great deals on some produce. I was particularly excited about the fresh snow peas, and immediately knew that I wanted to do a stir fry or something closely related to that. Chicken Chow Mein sounded really good to me last night, but when I went to the pantry, I didn't have chow mein noodles. I did have spaghetti, which I have seen used and is actually very good, but I only had fettucini and angel hair and those don't quite cut it. The next logical step for me was chicken ramen!

Make sure you have all of your ingredients measured and ready, because this kind of cooking goes really quickly! Start by chopping your vegetables and then cutting your chicken into bite sized pieces. Place them in separate bowls and set aside. In another bowl, add your rice vinegar, soy sauce, corn starch, sugar - and it sounds weird - but also stir in one of the chicken seasoning packets from the ramen. Now take two blocks of naked ramen noodles and place them in boiling water for two minutes. Immediately drain them and toss them with a few teaspoons of oil so they don't stick together. Set aside.

Place two tablespoons of oil into a hot wok or nonstick skillet. Stir fry your chicken just until no longer pink, then remove from pan. Add the water chestnuts, onions and celery, letting them cook until the onions are just beginning to get soft, not translucent - about five minutes. Now throw in your snow peas and cook for two more minutes. Add in your ramen noodles and gently toss with the vegetables, then stir your sauce together well and add it to the pan. Toss together gently to mix, then add your chicken back to the pan followed by the fresh ginger. Cook just until sauce begins to thicken slightly.  That's it!  You're done!

I am drooling all over again just thinking about this.

Okay now for the best part!  Can you believe this whole entire meal cost just a little over FIVE dollars?! I was completely astounded when I added up the price, and when I shared it with my husband, he responded with a knuckle bump. That's some serious props right there, people.

So here's the breakdown:
1 lb. chicken tenders = 2.69
2 packs ramen @5 for $1 = .40
1 onion @$2.99 for the bag of 9 = .33
ginger root - .68 for the piece I got which I used 1/5 of = .14
snow peas = .64
celery @.99 for the whole bunch of which I used 1/8 of = .13
1 can water chestnuts = .79
I didn't count the soy, corn starch or rice vinegar since they were in my pantry already.
Total spent = $5.12.
No, seriously.  For a whole four serving meal. Now that is awesome!


Wednesday, March 19, 2014

Asian Inspired Green Beans

One of my husband's very favorite dishes that I cook is one for Citrus Ginger Chicken that someone introduced me to from Eat Better America. It's really fantastic - full of flavor, easy to do, and not bad for you! I suggest checking it out.

My birthday was last month, and a friend of mine gave me a gift card to The Fresh Market, which cracks me up because it just shows how much my friends know me if they are going to give me a foodie gift! During my stroll through the store, I picked up some organic green beans and freshly ground peanut butter. I love green beans. I think they have a bad rep, but they are my very favorite green vegetable!

In looking for a healthy side dish to go with my citrus ginger chicken, I decided to do a quick marinade of Asian green beans. These are SO much better when the flavors are left to develop overnight, but if you're looking for something easy, quick and tasty...give this recipe a try.

First, make sure you wash your produce. I won't even go into what sorts of nasty can be on produce, so make sure you always wash stuff before you eat it. Next, I trimmed the ends off the green beans. Most people just trim the stem end, but I trim both. I don't know why, I just always have.


Next you want to combine these things in a bowl:
2 tablespoons soy sauce
2 tablespoons rice vinegar
1 tablespoon sesame oil
1 teaspoon minced garlic,
2 tablespoons sugar or honey
1 teaspoon minced fresh ginger, or 1/2 teaspoon ground

Toss green beans into a pot of salted water and leave them on a medium boil for about five minutes. This cooks them enough so that they aren't fibrous, but still have great color and crunch.

After letting them boil, drain them and immediately plunge them into a bath of ice water. This will stop cooking and help retain that gorgeous green and delightful snap.

Leave them there for another five minutes, drain them well and place them into a bowl or a Ziploc bag. Pour marinade over them, toss them well in it, and put them in the fridge until dinner is ready.

When ready to serve, I usually sprinkle mine with sesame seeds but that's optional! Enjoy!

Tuesday, March 4, 2014

Gone Fishin', Day 3 - Hard Cider Pancakes

It's National Pancake Day!

Soooo...I was working to do a week's worth of entries for the fishing crew. Truth be known, I could not have picked a worse time to try and do that! I tried to do it in the same week of my birthday. My 40TH birthday, to which I was hosting family coming in for the festivities...and festivities that I was attempting to plan and do all by myself since hubby was so busy at work.

Honestly, my intentions were good. They really were. I had all sorts of recipes and ideas written down to do, and I will still get to them...but alas, I am tardy.

So one of my things I was working on was cider pancakes. I have made these before using whole wheat pancake mix, Woodchuck Granny Smith cider, and fresh diced apples. Of course, when we're talking super portable this pretty much takes the cake. Er, the pancake, that is.

It really can't get much easier than this, guys. Toss the mix in a bowl, add cider, stir, cook. I also like to punch it up a little bit by adding a little sprinkle of cinnamon, allspice and nutmeg to the batter. The trick to a great pancake is to keep the skillet over medium low, and flip it just when the edges start to look a little dry.

The trick to the perfect pancake, however, is something that can either be the hardest or the easiest thing in the world to learn. That is this: the first pancake is always a hot mess. Let it go to the pancake gods and keep moving. Hubby refers to this as the tester pancake to make sure it's fit for human consumption.

Ha!

For this particular pack, it used a little over 1/2 of the bottle of cider and made 8 pancakes. So either double the packs for one bottle of cider, or use the leftover cider to reduce with brown sugar, cinnamon and nutmeg to make a yummy little syrup  for your pancakes! (which is especially yummy with some of those chopped apples mentioned above in it as well)

Oh yeah...that's good stuff.

I see a million different combinations with this based on all of the different kinds of beer that is out there. Try your hand at all of them! The only thing I might suggest is to watch using a dark beer like a stout, simply for no other reason than I could see the pancake turning bitter on you. Have fun!

Monday, February 17, 2014

Going Fishin' Day Two - Tuna Melt

I must admit that I am a bit on the picky side when it comes to tuna.  I like it, but I have never liked to eat it warm.  Out of the can that is, because I can eat a tuna steak fresh off the grill without batting an eye. So the first time I heard about a tuna melt, I was a bit hesitant to even go there....but I finally did.

The beauty of this is that it is entirely portable to make on the go when you go fishing or camping thanks to StarKist making tuna salad in the foil packets. The only thing I would change about making this even at all is the fact that I would most definitely put it on Texas toast bread, because while I love Whitewheat, it's just too wimpy to support this hearty of a sandwich.

Not to mention that quite frankly, the idea of a soggy, wilted tuna melt just makes my tummy do a twirl...and not in a good way.

So first, go ahead and butter your bread. I know you are asking how butter can possibly be portable without dragging around a stick of it in your backpack? There are several answers to that, actually. You can buy the liquid squirt butter in the plastic bottle, which is actually kind of yucky yet functional...or the next time you make a run for KFC, ask them for a few packets of butter. They actually have butter packaged like ketchup, which is something I never even knew existed until last year.

Now heat a pan or skillet over medium heat and when it gets hot enough, gently place one piece of bread butter side down in there and put a slice of American cheese on top. You will have to work quickly here, or the bread will burn...and that sounds as unappetizing as a soggy, wilted sammich.

Once you have the cheese on, you can open the packet of tuna salad and spread that over the cheese.  Now cover the tuna with more cheese. You can use another slice of American, some Swiss, or whatever you choose. I personally went with mozzarella.

Now top the sandwich with the other slice of bread, butter side out. When the bottom gets golden and crunchy, very gently turn the sandwich over to brown on the other side, very much like a grilled cheese. Just make sure you gently handle this or the filling is going to come right out and make a huge mess!  (er, not that I would know or anything)

Now fish it out of the pan (heh, see what I did there?), and grab a plate. Because I was a good wifey when I made this for my hubby last night, I cut it in half for him. Of course, I also wanted to see what the inside looked like. It actually looks pretty good, and hubby said it was yummy.

I guess the truth is...I still have not eaten a hot tuna sandwich.
Maybe someday.

Friday, February 14, 2014

Going Fishin', Day One - Gettin' Saucy

So a few weeks ago on my Facebook page, I had someone request some ideas for recipes that would be quick and easy - and hearty - to take on a fishing trip. I thought and thought about some stuff, got some ideas, scrapped some ideas...and came up with some stuff I think you fishermen will really like!

One of the easiest things I know how to make is pasta sauce. The plus side is that it freezes beautifully so you can make it in advance and keep it for a quick, easy meal. I love cooking some pasta, mixing it in with the sauce, putting it in containers and freezing individual portions. It's perfect when you have as lazy weekend where you don't feel like cooking but want something that's not fast food. Just pop it in the microwave and there ya go.

For years, I have seen a friend of mine on Facebook talking about making The Pioneer Woman's spaghetti sauce. So the last time I made sauce, curiosity got the best of me, so I went to her site and looked up her recipe. I figured, what the heck, I have been making mine the same way for so many years that perhaps it was time to try a new recipe. When I got to the website, I smiled and chuckled a little to myself because our recipes were really very similar!

So really, it takes no time at all. First, go grab a green pepper and an onion. Then grab a pound of ground beef and some garlic.Chop the pepper and onion and add it to the skillet with the ground beef (or turkey or Italian sausage if that's your taste). If you have raw garlic, chop 3 or 4 cloves and add it to the mix. Just so everyone knows:  I am lazy. I used the pre-chopped kind that comes in a jar.

I feel no shame. Sometimes, it's bad enough peeling onions.

Sprinkle salt and pepper over top and brown all of that together until the beef is done. It doesn't matter if the veggies are still crunchy, because they will soften as the sauce simmers. Drain the fat off and put it in a large sauce pot.

I'm not Italian. Not even a little part of me. I'm German, Irish, Scottish and French (also known as mutt), but no Italian. I'd  like to pretend that I have a sweet little Italian grandmother hidden away somewhere, and she will pop out and show me how to make her secret sauce from the Old Country...but yeah...not going to happen. That's why I use canned tomato sauce and a jar of pre-made spaghetti sauce as my base. Again, no shame in my game. I usually use a big jar of sauce, and about 24 ounces of canned tomato sauce.

Once that's all mixed together, I add about a tablespoon each of oregano, basil, garlic powder and sugar. Then about a half a tablespoon of thyme. I eyeball all of these in the palm of my hand. and may even add more as the sauce cooks, so make sure you add to your personal taste!

The last thing I add is about a tablespoon of tomato paste. The one thing about tomato paste that has always bugged me is that I never use much of it once I open the can. So now I measure out one tablespoon increments and wrap them in plastic wrap. Then I freeze them. Every time I make sauce, I just plop one of the frozen tablespoons of tomato paste in there, and there's no waste! I have also seen people freeze it in ice cube trays and put them in a Ziploc once frozen. That's too much work for me...plus I don't want to wash anything I don't have to. Heh.

Now stir that all together, cover and let it simmer on low for a few hours. Make sure to stir every now and then so it doesn't stick, and so the tomato paste gets mixed in well once it thaws if you use it frozen.

I'm starting to be sorry I talked my husband into going out to eat tonight, because my kitchen smells SO good right now. I could eat a bowl of just the sauce with garlic bread and be happy. I don't even need the pasta.

For travel:
Cook up some pasta, drain it and rinse it in cold water to stop the cooking process. Drain it again and add some sauce to it. Throw it in a Ziploc and toss it in the cooler. When you're ready to eat, just heat up a pan on your portable stove and warm it right up. Just a tip: go a little heavy on the sauce to noodle ratio, because the pasta will continue to absorb moisture for a bit.
Enjoy!

Friday, January 31, 2014

Quick & Easy Salisbury Steak and Gravy

I have not thought about making nor eating Salisbury steak for a long time.  For years, it has been a food that I associated with lunchroom mystery meat. Tasteless hunks of "meat" covered in some "gravy" that was comprised of congealed lumps rather than a smooth velvety blanket. Yes, this meal was something that brought to mind slow moving lines in which grumpy women in hair nets slopped it down on your plastic tray whether you intended to eat it or not.

So I was a bit taken aback when I ran across a recipe a few months ago for it, and even more surprised that I wanted to try it. After all, it's been...a while.

After making it, I decided that Salisbury steak just might have a some redeeming qualities to it after all. That said, it was just...missing...something. Onions! It was missing a lot of onions! I love the flavor that caramelized onions impart to ground beef, and that was what I wanted in my Salisbury steak. Especially if made with a sumptuous gravy that you can picture spilling down on a mound of creamed potatoes. Comfort food at its finest! As cold as it has been here for the last month, comfort food spreading its warmth through your belly is very welcome at my house.

Start by grabbing a pound of ground beef. Add one small diced onion - but leave out 1/4 cup, 1/2 cup bread crumbs, 1 egg, 1/4 teaspoon salt, 1/4 teaspoon pepper and 2 tablespoons Worcestershire sauce. Preheat oven to 350ºF.

That's it. Use a wooden or metal spoon to gently mix it all together until combined. I say that because if you use your hands, the warmth from them will start to melt the fat in the meat resulting in a tough patty. So there you have it...don't handle your meat too much.
It will make you blind.
*waits for other jokes*


Gently form the meat into patties. I got six big ones from my mix, but you can make them any size you wish. Just remember to adjust your cooking time to cover whatever size you choose. Heat a nonstick skillet over medium high heat and add a couple of tablespoons of oil to it. Sear the patties for about 5 minutes each side, and place them in an oven safe dish. Try use a large enough dish so that you can place all of the patties in there in a single layer. Pour off excess oil from the skillet, and reduce heat to low. DON'T scrape out the bottom of the pan.

Unless you burned the patties, because then you kinda will need a whole new pan for this next part, and it won't be as good. Truth.


This is where the magic happens. Gravvvvvvvvvvvvvy!

First, start with tossing that 1/4 cup of leftover onions into the pan. Stir them around just until they start to get a little brown and soft. Next, add about a cup of HOT water to your pan. Make sure it's not cold water, because cold water in a hot pan can warp the bottom and make it wobble...which is a true pain in the arse if you cook on a flat top. Trust me. I've cooked on many a wobbly pan because I was a moron.

After you add the HOT water, rip open a packet of dry Lipton Beefy Onion Soup Mix and add it to the pan. Stir the mix into the water, using any spoon or spatula that is not metal (because it will ruin your nonstick pan), and gently scrape along the bottom to loosen all that yummy goodness that was left by the patties. Now add some black pepper and stir. Let that cook for a few minutes, then make a water/cornstarch slurry to thicken things up.

Once you have the gravy the consistency you want it, pour it over top of the patties in the oven safe dish. Cover and put in preheated oven, and let it cook for 20 minutes.

You will be generously rewarded with moist, melt in your mouth Salisbury steak. Mmmm.

Initially, I had planned on eating one patty. After I finished the first one, I went back for another. My taste buds were singing, but my tummy was not. Apparently, the first patty in addition to the succotash I made to go along with it was sufficient whether I knew it or not. (and yes I am that weirdo that likes to put things in separate bowls so flavors don't mix.)

It should also be mentioned that I suffered a major party foul for dinner last night, seeing as I did not have any taters to make creamed potatoes. Massive party foul, precious.

It was still good, though.

Thursday, January 23, 2014

Super Simple Lazy Day Chicken & Dumplings

Another "Polar Vortex" is attacking the part of the country where my hubby and I live. No less than five inches of snow on the ground and temps barely reaching double digits.
Polar Vortex. *derisive snort*
At the risk of sounding old - and I am turning the big 4-0 next month - but back when I was a kid, snow and single digit temperatures were just called Winter. Currently, it is snowing again. It's pretty, and I love watching it fall. What I don't like is my husband's hour long commute (on a clear day!) to and from work in busy Northern Virginia. It makes me worry.

Anyhow, when it's really cold outside and especially when there is rain or snow happening along with it, I crave comfort stick-to-your-ribs kind of food. Chili and cornbread, Salisbury steak and gravy with mashed potatoes, corned beef soup...and my mom's super easy chicken and dumplings.

Don't be fooled. This is not a recipe for anyone looking to lose weight.
That said, if you have spent a long day shoveling snow, scraping ice, or even just out playing in snow or cold weather, this is an awesome dish for those kinds of days.

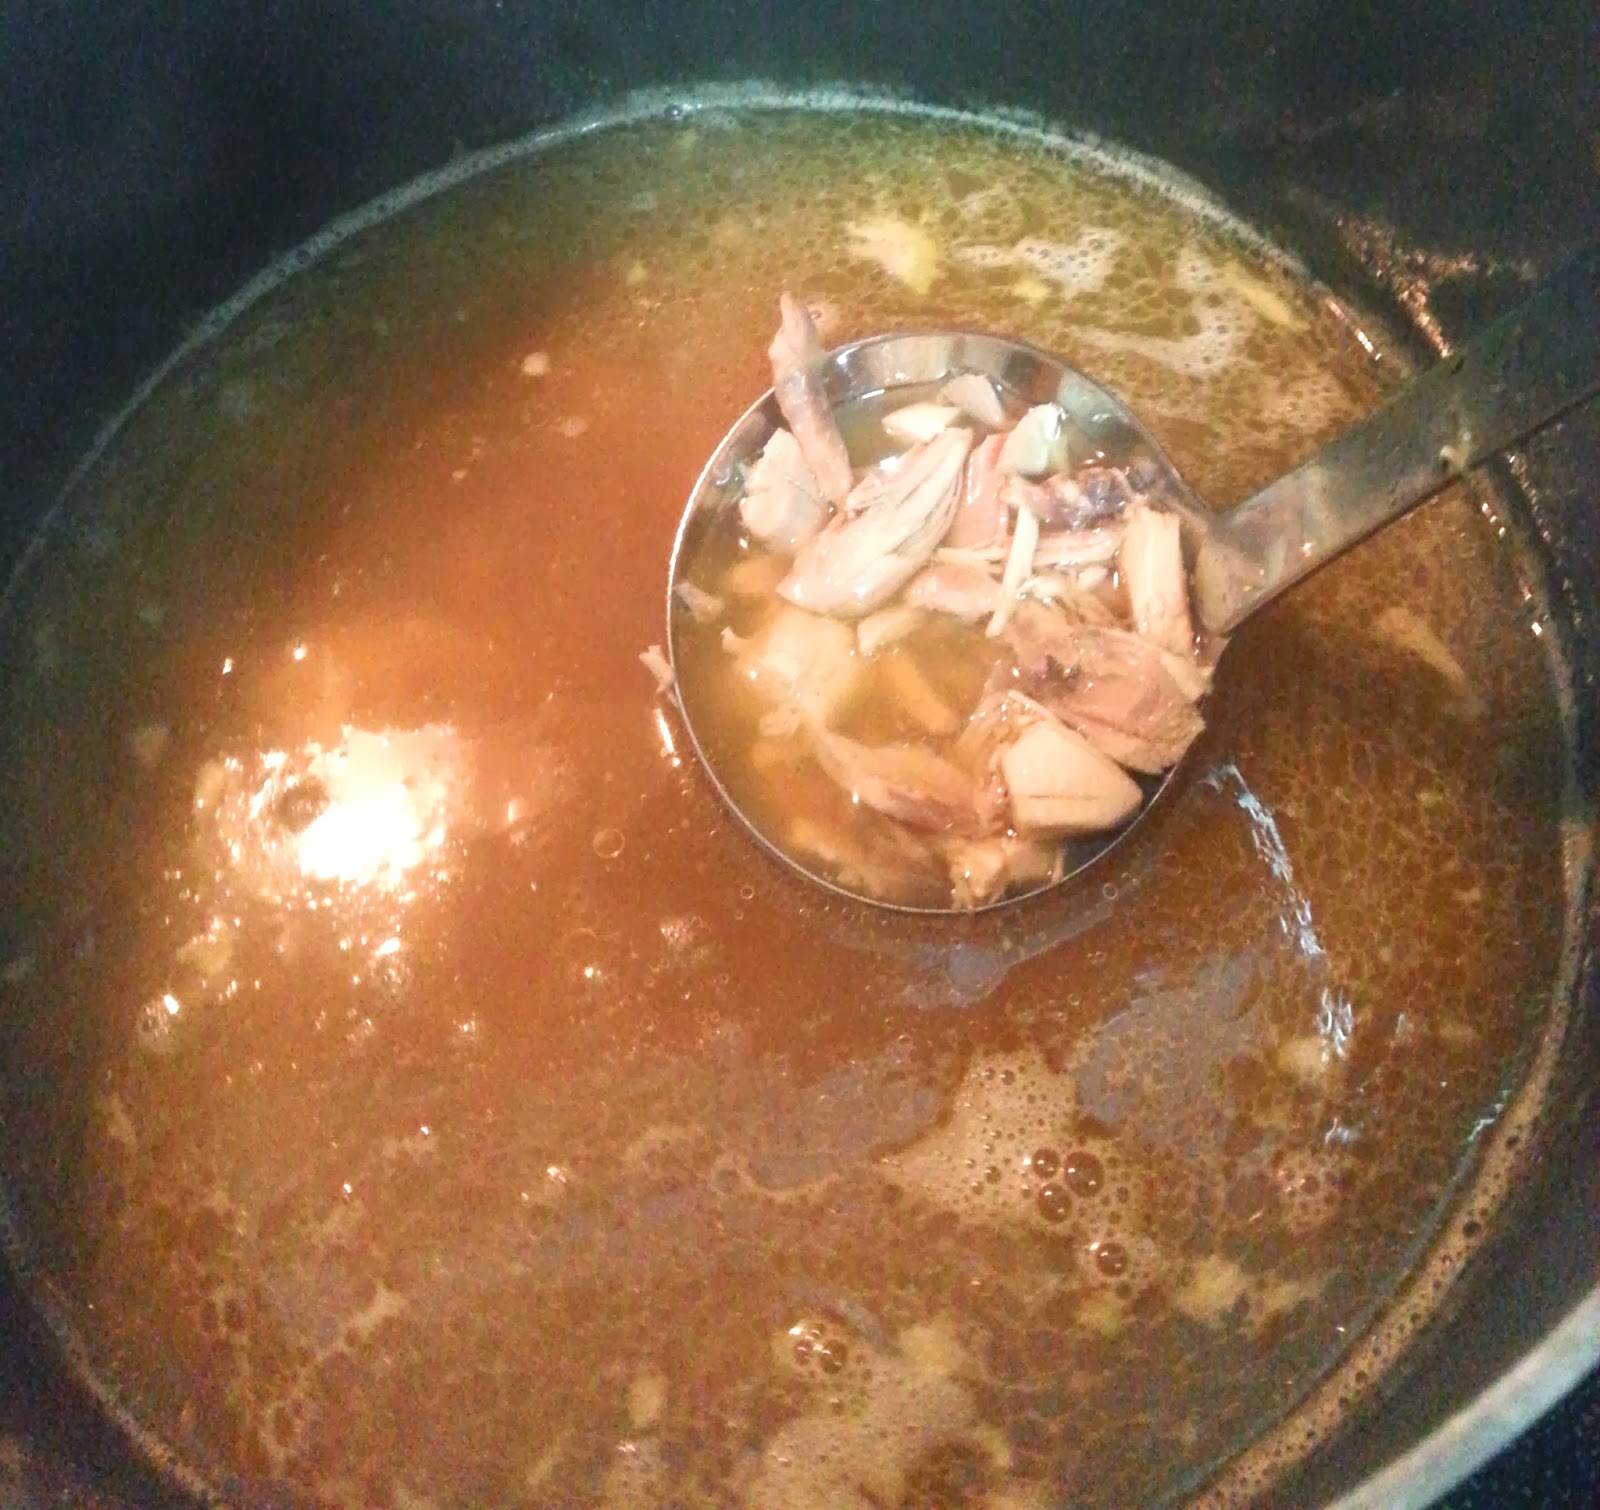
The day before making this dish, I had cooked a whole chicken in the crock pot for dinner. Hubby and I ate the breasts only (minus the tenderloins because that was one huge bird), so the remainder of the chicken got de-boned, chopped and set aside for dinner the following night. I also strained the broth from the slow cooker, returned it to the crock, added water and the bare chicken bones. I set it to low and let it cook a few hours to make stock for the dumplings.


If you do that, put the whole crock in the fridge overnight. Then scrape off the fat from the top and strain the broth into a large stock pot. You may need to add a few cups of water or broth from a carton or can to fill the pot halfway. Now toss in your chicken, and turn the heat to medium. Let it come to a very low boil.


Okay now it's time to work on the dumplings. Here are the ingredients:


No, seriously. There they are. A four pack of cheap canned biscuits.
Truth? I don't know how to make homemade dumplings. I have never tried. While I am sure that I could, I just love these so much that I will more than likely probably always make them this way. They are so chewy and yummy and just soak up all the flavor in the broth...I have to stop. I just started drooling.


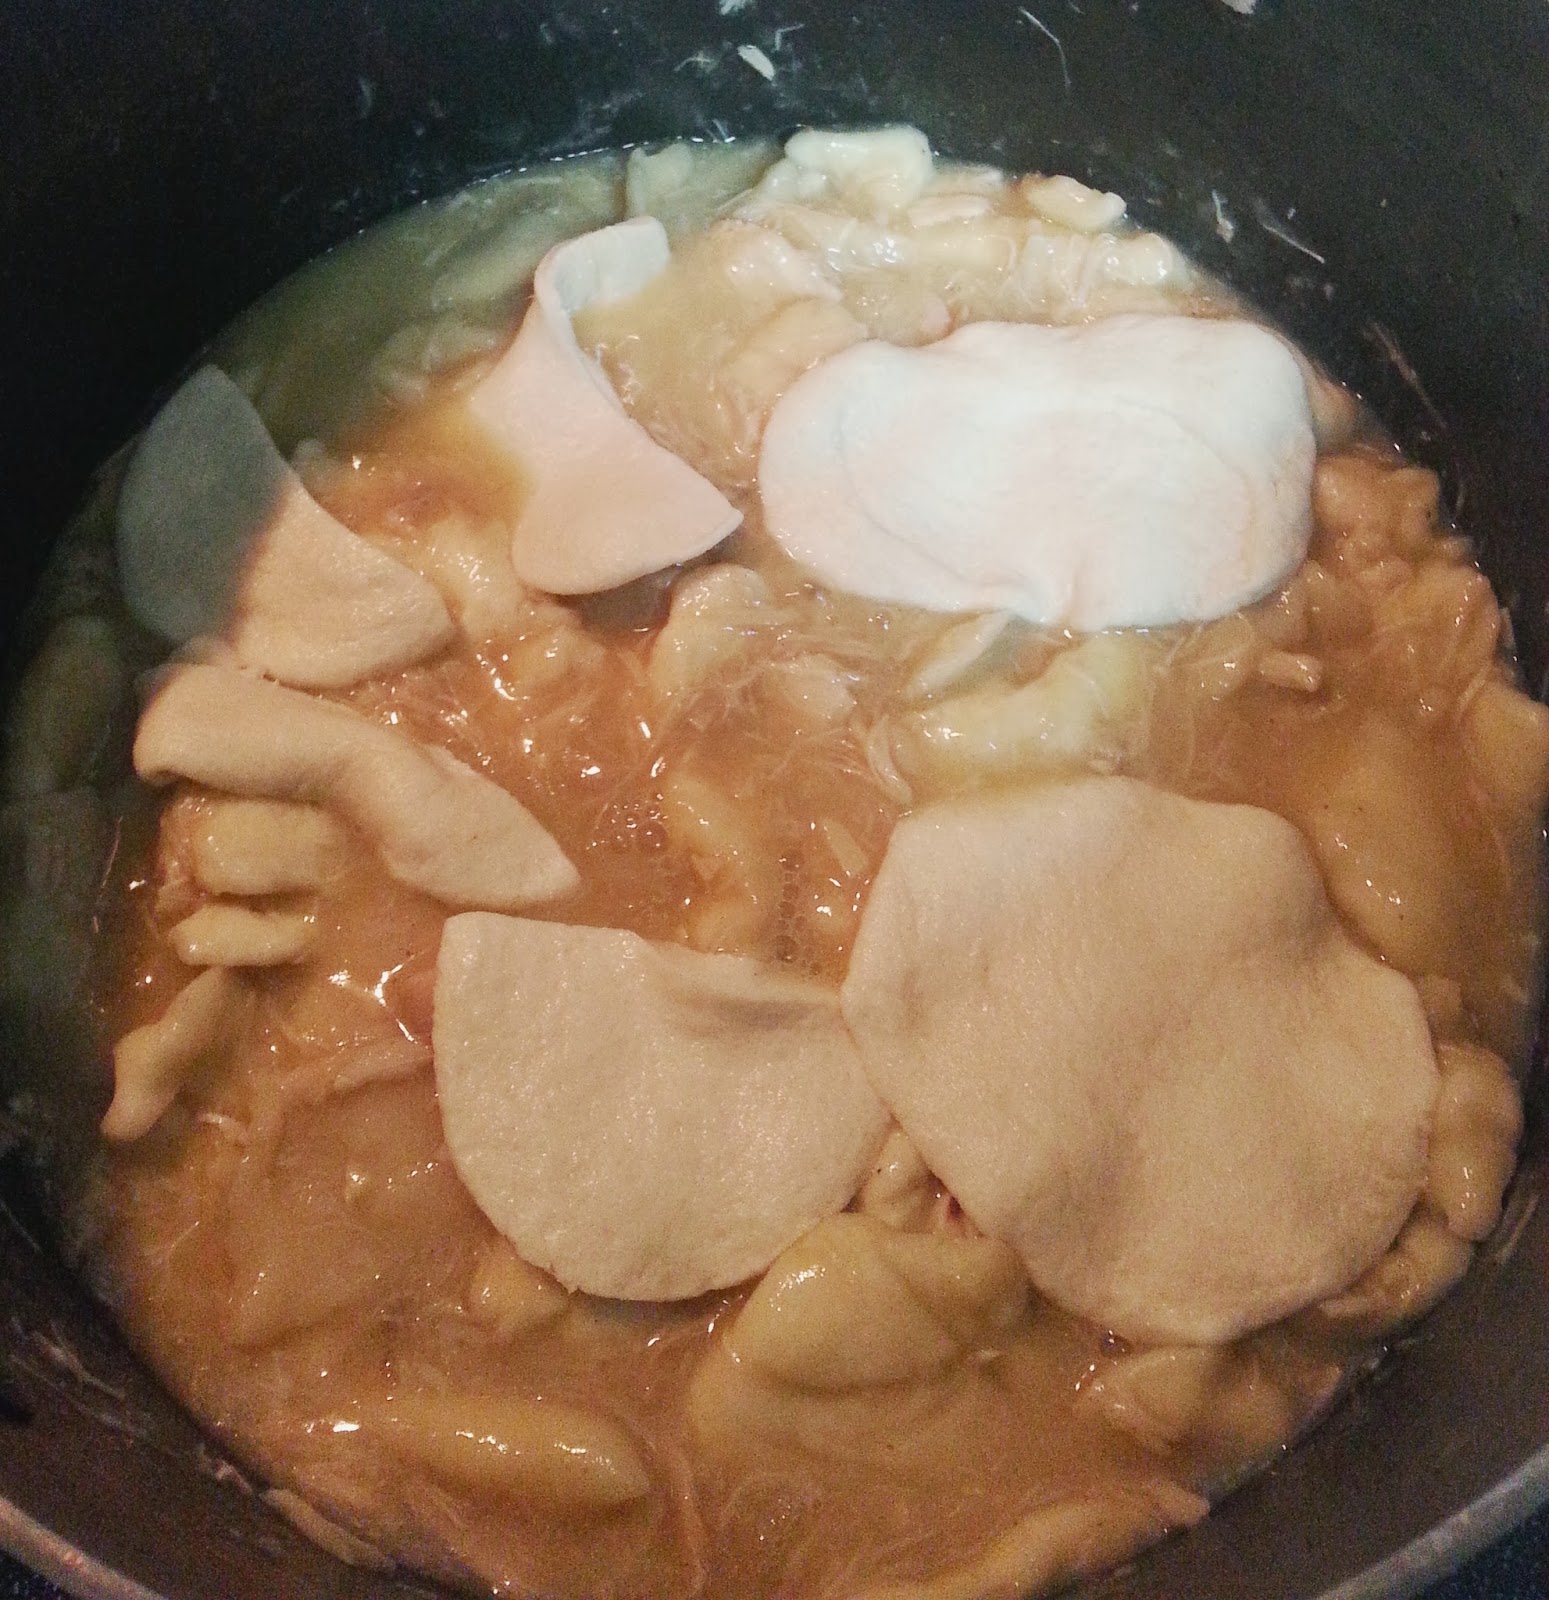
Okay so you flatten those bad boys a little bit and drop them, one by one, into the broth. Do the whole can. Done? Okay, do the second can.  


When you're done with that, do the third.
Nope. Not kidding.


Look in there. That's a lot of dumplings, isn't it? Well guess what? We're going to throw that last can of  biscuits as well.
What?! Is she insane?! Does she have no regard for fat and cholesterol?
Meh.
Do it. Feel the freedom. Throw caution to the wind. Embrace the inner fatty. Just work it off later...however you feel the need to do your cardio.  *wink, wink, nudge, nudge*


Seriously, though...the reason for so many is that by the time you get to the fourth can, the first can has melted into the broth...and that's great! It's what makes the chicken and dumplings get nice and thick and hearty. Plus, I just really like a lot of dumplings. I'm the girl who went to Cracker Barrel a few months ago and ordered their chicken and dumplings...with dumplings as my optional side. Yep. That happened.

Let that cook down for a few minutes so the biscuits you just added aren't raw. Look in that pot, what do you see? The chicken has broken up and is sticking to the dumplings as you stir, and stirring wasn't as easy as it was a few minutes ago! Don't forget to add salt and pepper to suit your taste buds.

Seriously, I am drooling writing this post. I need to go find something non-food related to do. Like laundry. Nothing like washing dirty socks and underwear to kill an appetite.


So, hey...if you try this...come back and let me know what you thought, okay?  Enjoy!

Thursday, January 16, 2014

Chicken Casserole and the Unintentional Sabbatical

Wow that break went on for longer than I intended.

It's been both a busy and rough past couple of months:  father-in law visited for a week, immediately followed by being sick, followed by our annual Christmas movie marathon, followed by being out of town, followed by Christmas, immediately followed by the flu, which was topped off by my getting bronchitis after the flu.  It's been three weeks since hubby and I both had the flu simultaneously (that sucked!), and I am still doctoring a nasty cough from the subsequent bronchitis.  Ugh.

So, yeah...Merry Belated Christmas and Happy New Year and, uh, everything.

I think I promised to do the recipe for my mom's chicken casserole a few months ago.  Better late than never is my procrastinator's credo.

I absolutely adore this recipe.  It's SO good, and really simple to make.  There are literally only six ingredients:  chicken, stuffing mix, chicken broth, butter or margarine, cream of chicken soup and cream of celery soup.

So we start off with the chicken.  I boiled two large bone-in chicken breasts until cooked through, and reserved the broth I cooked them in and set it aside.  You can use a pre-cooked rotisserie chicken, leftover fried chicken, leftover turkey, or even canned chicken.  Just make sure you pull it all off the bones, remove the skin, and roughly chop it.

You want between 2 or 3 cups of chopped chicken. Divide chicken into 2 equal parts.


Now empty each can of cream soup into a separate dish.  Using the cans from the soup you just emptied, fill each one with broth and then add one can to each bowl of soup.  Stir until well combined.


Put your stuffing mix into a large bowl.  Grab the stick of butter/margarine and melt it.  After it has done so, pour it over the dry stuffing mix and stir it together very well. Divide stuffing mixture into three equal parts.


Now grab a large baking dish.  Put a layer of stuffing into the bottom.  Now take one half of the chicken and sprinkle that over the stuffing.  Pour the cream of chicken soup mixture over top of that.  Top with stuffing, then rest of chicken, then cream of celery mixture. Sprinkle the rest of the stuffing on the very top.


After everything is combined and ready, cover top with a lid or foil and place in preheated 425ºF oven.  Bake for 30 minutes.  The sides should be bubbling, and you should be about ready to climb into your oven with a fork because of the heavenly aroma.


I cannot tell you how many Sunday dinners were spent salivating and gorging ourselves on this dish.  I have no idea where mom came up with this recipe, but I can't make it without a smile on my face and memories in my heart.  I just know you will love it!